USB Flashing Help for Guition ESP32-P4
Use this guide when the Espframe web installer cannot find the display, flashing fails, or the browser does not show a serial port.
Use the Correct USB-C Port
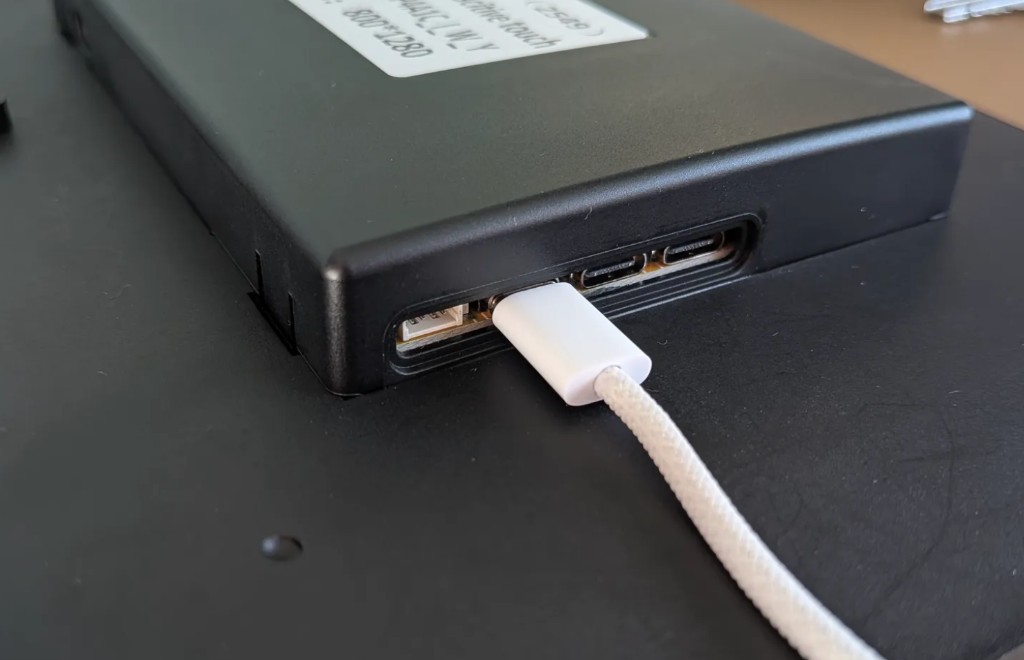
The Guition ESP32-P4 display has two USB-C ports. For flashing Espframe, use the bottom USB-C port near the edge of the board and next to the USB-A connector. The upper USB-C connector is for the screen ribbon cable and will not work for flashing.
Browser Requirements
The Espframe installer uses Web Serial, which means you need:
- Chrome or Edge on a desktop computer.
- A USB-C data cable, not a charge-only cable.
- Permission to access the serial device when the browser asks.
Safari and Firefox do not support the required browser flashing flow.
If No Serial Device Appears
- Check that the cable is plugged into the bottom USB-C port.
- Try a different USB-C data cable.
- Try another USB port on the computer.
- Close other tools that may already be connected to the device.
- Refresh the install page and click the install button again.
If Flashing Starts but Fails
- Keep the browser tab open until the install completes.
- Avoid moving the cable or display during flashing.
- Disconnect and reconnect the display, then start the installer again.
- If WiFi setup does not appear after flashing, open the WiFi settings on your phone or laptop and look for a network starting with ESP_, such as ESP_7A1EED. The letters and numbers after ESP_ come from the frame’s MAC address (its network identifier), so your frame’s name will be different. Connect to it, then visit
http://192.168.4.1to enter your home WiFi details.
After Flashing
When Espframe boots, connect it to WiFi and open the IP address shown on the display. Enter your Immich server URL and API key, then choose a photo source.
For broader setup issues, see Troubleshooting Espframe.
