EspControl
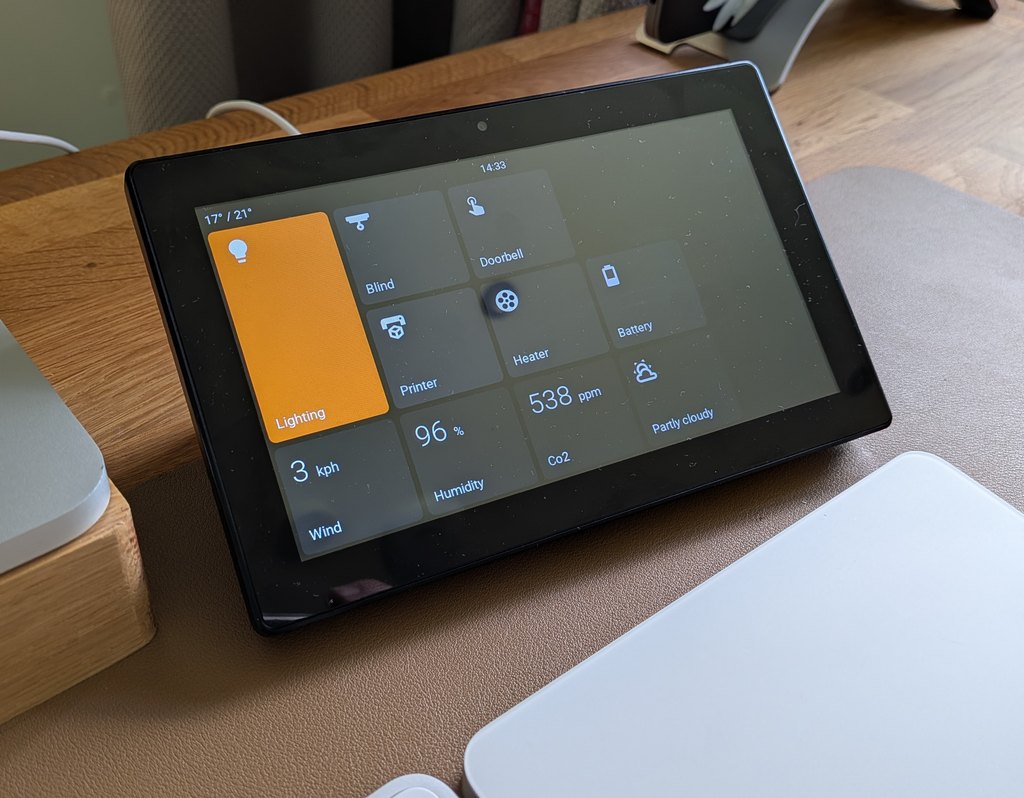
A no-code touchscreen controller for Home Assistant. EspControl turns affordable ESP32 touchscreens into dedicated panels for the lights, scenes, sensors, heating, garage doors, media players, cameras, alarms, and routines you use every day.
You do not need to write YAML, build your own ESPHome configuration, or keep a tablet permanently logged into Home Assistant. Install the firmware from a browser, connect the screen to WiFi, add it to Home Assistant, then configure the panel from its built-in setup page.
Start here: Install EspControl.
Source code and issues: github.com/jtenniswood/espcontrol.
What You Can Build
- Room control panels for kitchens, hallways, bedrooms, offices, garages, and utility rooms
- Simple family controls for scenes, scripts, lights, fans, covers, locks, and garage doors
- At-a-glance dashboards for clocks, weather, temperature, humidity, battery, power, presence, doors, windows, and custom sensor text
- Media and camera panels with now-playing information, cover art, playback controls, volume, progress, and camera images
- Compact secondary pages for rooms, device groups, settings, or less common actions
Main Features
- Browser-based installer - flash supported screens from Chrome or Edge using a USB-C data cable.
- Built-in setup page - configure cards, pages, icons, labels, active colour, display settings, backups, and firmware updates from a phone, tablet, or computer browser.
- Drag-and-drop grid layout - each supported display has a layout sized for its resolution, with Single, Tall, Wide, and Large card sizes.
- Subpages - open folder-like pages for rooms, device types, or extra controls while keeping the home screen tidy.
- Home Assistant controls - control lights, switches, fans, covers, locks, alarms, climate devices, media players, scenes, scripts, automations, buttons, helpers, webhooks, and built-in relays.
- Live Home Assistant information - show sensors, binary sensors, weather, clocks, time zones, doors, windows, presence, camera images, and media player status.
- Display behaviour controls - set brightness, idle timeout, screensaver mode, presence-based wake, clock bar, rotation, screen schedule, and before-clock-sync behaviour.
- Appearance controls - choose card icons, labels, status text, active colour, display modes, clock style, temperature units, and panel language.
- Firmware updates - keep panels current over WiFi after the first install, with a manual update option when needed.
- Backup and restore - export a setup, restore it later, or copy it to another compatible panel.
Card Types
EspControl includes card types for common Home Assistant controls and display-only information:
Switch, Lights, Action, Local Action, Option Select, Webhook, Trigger, Sensor, Local Sensor, Doors & Windows, Presence, Slider, Fans, Vacuum, Lawn Mower, Cover, Garage Door, Lock, Alarm, Date & Time, World Clock, Weather, Camera, Media, Climate, Internal Switches, Screen Lock, and Subpage.
See Card Types for examples and setup notes.
How It Works
- Buy a supported ESP32 touchscreen.
- Install EspControl from your browser.
- Connect the panel to your 2.4 GHz WiFi network.
- Add the discovered ESPHome device in Home Assistant.
- Allow Home Assistant actions so the panel can control your devices.
- Open the panel setup page and choose the cards, pages, active colour, and display behaviour you want.
Where to Buy
| Screen | Panel | 3D printable mount |
|---|---|---|
| 10.1-inch JC8012P4A1 | AliExpress ~£40 | Stand page |
| 7-inch JC1060P470 | AliExpress ~£40 | Stand page |
| 4.3-inch JC4880P443 | AliExpress ~£24 | Stand page |
| 4-inch ESP32-P4 86 Panel | AliExpress ~£45 | Stand page |
| 4-inch 4848S040 | AliExpress ~£16 | Stand page |
Support This Project
If you find this project useful, consider buying me a coffee to support ongoing development!

Next Steps
- Install — what you need, how to flash, and first-time setup
- Setup — how to configure cards, display, and screensaver from your browser
- Card Types — choose the right card for each Home Assistant control, sensor, or panel action
- Firmware Updates — how update checks and WiFi firmware updates work
- Backup — how to save, restore, and move a panel setup