
Configure Your Home Assistant Touchscreen
Your EspControl panel has a built-in web page where you can set everything up. Open it by typing the panel's address into any browser on your phone or computer.
Finding the address
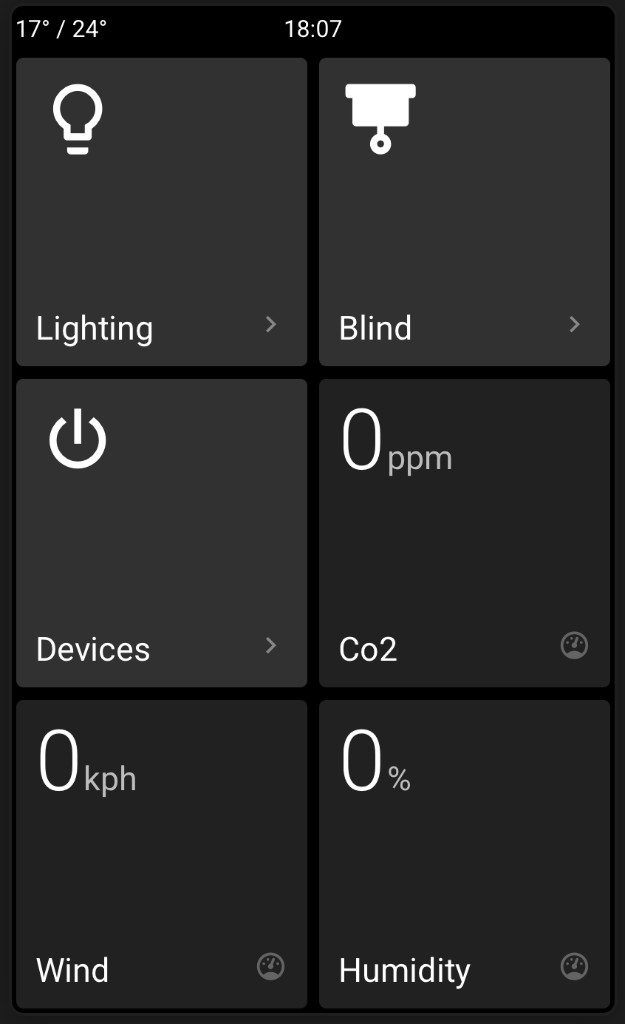
The address is shown on the display screen when no cards are configured yet. You can also find it in your router's connected devices list, or in Home Assistant under Settings > Devices & Services > ESPHome.
Adding a Card
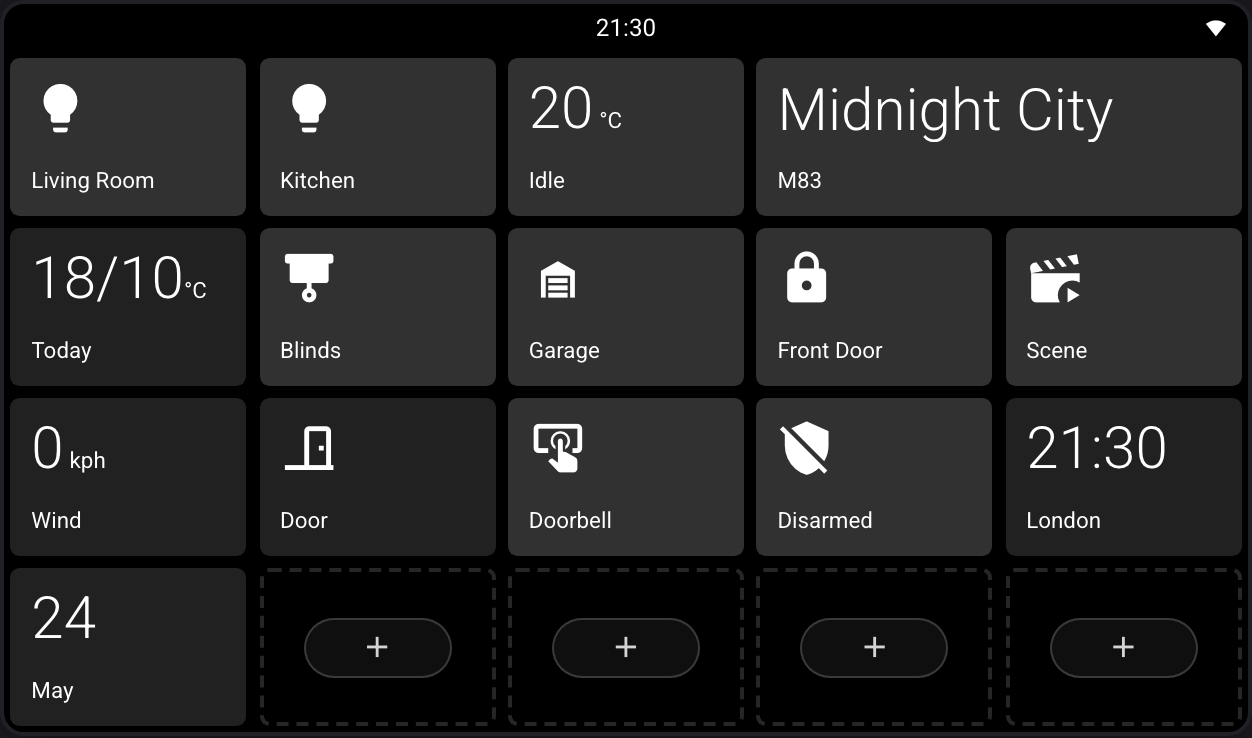
Tap any empty space in the grid (shown as a dashed outline with a + icon), then choose a card type. Its configuration opens with the card name as the heading and the same settings layout used when editing a saved card. To choose a different card type, close the panel and start again from the empty space.
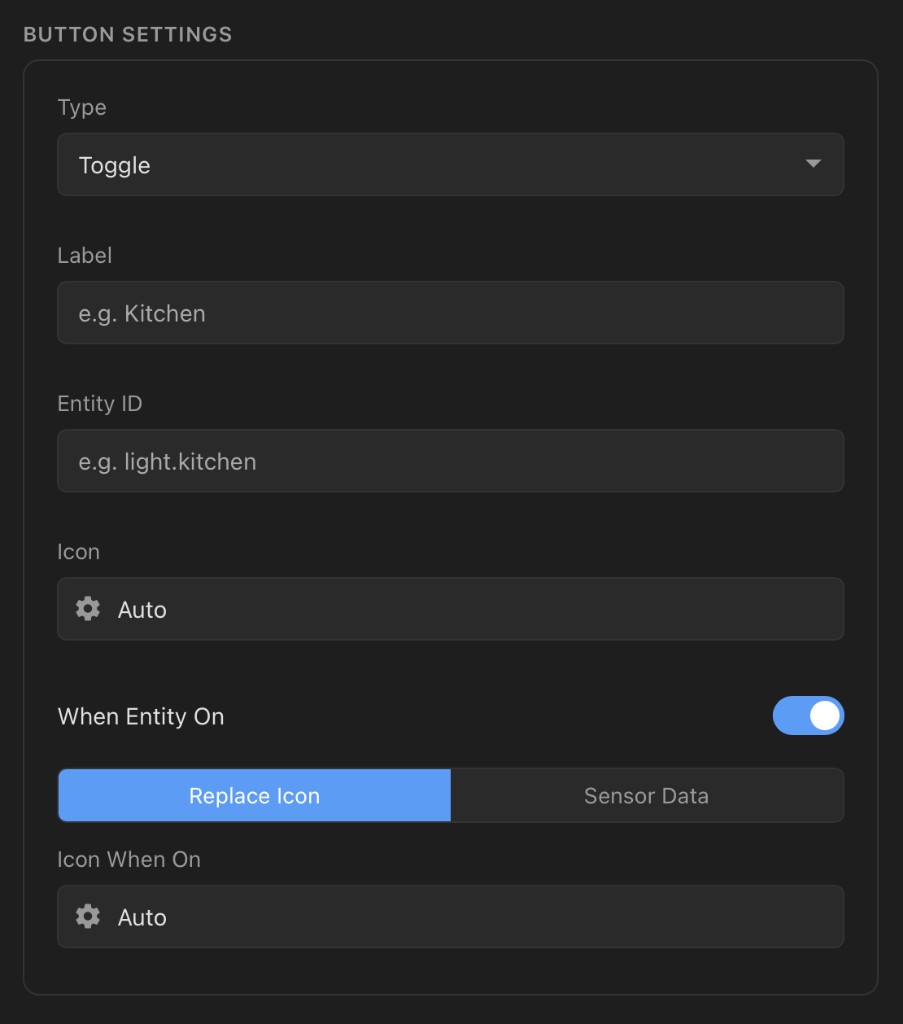
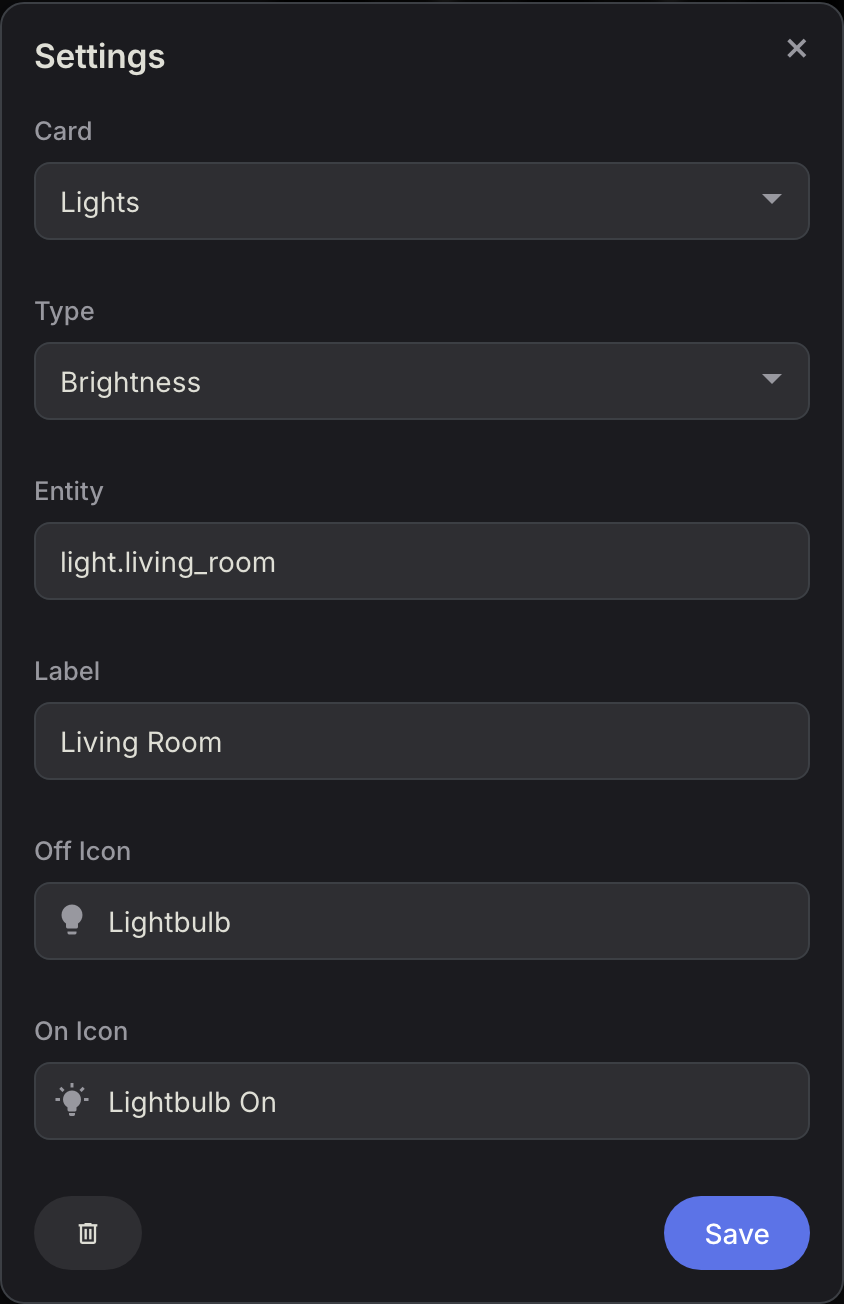
The setup page uses these card names and grouped modes on the device. For a quick comparison, see the Card Types overview.
| Type | What it does | Needs an entity? |
|---|---|---|
| Switch | Controls a Home Assistant entity and shows its on/off state. This is the default card type. | Yes |
| Lights | Controls a light as a full control popup, switch, brightness slider, or colour temperature slider. | Yes, as a light entity |
| Action | Runs a one-tap Home Assistant scene, script, button, helper action, Option Select picker, or local panel action. | Depends on the selected action |
| Option Select | Opens a live select or input_select option list through the Action card. | Yes, as a select entity |
| Webhook | Calls an HTTP URL directly from the panel for other automation platforms and webhook services. | URL |
| Wifi Sharing | Shows a QR code for separately configured guest Wifi. | No |
| Trigger | Fires an event to Home Assistant for use in automations. | No |
| Sensor | Shows a live numeric reading, readable duration, text state, or icon state from Home Assistant or a local device sensor. | Yes for Home Assistant, local sensor key for Local Sensor source |
| Doors & Windows | Shows a door or window contact sensor with open and closed icons. | Yes, as Sensor Entity |
| Presence | Shows whether a person, room, or motion sensor is active. | Yes, as Sensor Entity |
| Slider | Controls light brightness, fan speed, or a number / input_number value with a draggable fill bar. | Yes |
| Fans | Controls supported fan switch, speed, oscillation, direction, and preset features. | Yes, as a fan entity |
| Vacuum | Shows vacuum status or controls start/stop, dock, pause/resume, spot clean, locate, and clean area. | Yes, as a vacuum entity |
| Lawn Mower | Shows mower status or controls start mowing, dock, and pause/resume. | Yes, as a lawn mower entity |
| Cover | Controls blinds, shutters, and similar cover entities with a full control popup, slider, or tap action. | Yes |
| Garage Door | Controls a garage door cover entity with an open/close tap action. | Yes |
| Lock | Locks, unlocks, or toggles a Home Assistant lock entity. | Yes |
| Alarm | Arms, disarms, or shows a Home Assistant alarm control panel. | Yes, as an alarm control panel entity |
| Timer | Starts, cancels, or resumes a Home Assistant timer and shows its countdown. | Yes, as a timer entity |
| Date & Time | Shows the local clock, date, date and time, or a world clock. | No |
| Weather | Shows the current condition or today's/tomorrow's forecast from a weather entity. | Yes, as Weather Entity |
| Media | Controls playback, volume, track position, or now-playing details for a media player. | Yes, as a media player entity |
| Climate | Controls a Home Assistant thermostat or HVAC entity. | Yes, as a climate entity |
| Internal Switches | Controls a built-in relay locally on panels that have relay hardware. | Choose a relay |
| Screen Lock | Locks and unlocks local touchscreen controls on the panel. | No |
| Subpage | Opens a folder-like page of extra cards. | No |
For cards that use Home Assistant, enter the entity name from Home Assistant in the Entity field, such as light.living_room, switch.garden_lights, scene.movie_mode, or weather.forecast_home. Some card types use a more specific label, such as Sensor Entity, Weather Entity, or Climate Entity. You can find entity names under Settings > Devices & Services in Home Assistant.
Some card names group several related controls together. Lights contains All Controls, Switch, Brightness, and Colour Temperature options. Fans contains All Controls, Switch, Speed, Oscillation, Direction, and Preset options. Action contains scene, script, helper, Option Select, and Local Action modes. Sensor contains Home Assistant and Local Sensor sources. Vacuum contains Status, Start / Stop, Dock, Pause / Resume, Spot Clean, Locate, and Clean Area options. Lawn Mower contains Status, Start Mowing, Dock, and Pause / Resume options. Cover contains All Controls, Position, Tilt, Toggle, Open, Close, Stop, and Set Position options. Alarm contains All Controls, Arm Away, Arm Home, Arm Night, Arm Vacation, and Disarm options. Date & Time contains Clock, Date, Time & Date, and World Clock options.
For the generated list of current card domains, subpage support, grouping, and options, see the Card Capability Reference.
Most cards also let you choose an icon and set a label. If the label is left blank, the panel uses the friendly name from Home Assistant when it can.
Active Switch Display
Each Switch card has separate Off Icon and On Icon settings. The on icon is used while the entity is active.
You can also turn on Active Display:
- Numeric — show a live reading instead of the icon, for example temperature, power usage, or a percentage. Pick the Sensor Entity, Unit, and Unit Precision.
- Text — show a live text state instead of the label, for example a machine status or current mode.
When the entity is not active, the card goes back to its off icon and normal label.
Moving Cards
Drag and drop any card to reposition it. If you drop it onto an occupied space, the existing card shifts to the next available slot.
To copy cards to another controller without replacing its other settings, use Copy Code and Paste Code. See Copying Cards Between Controllers for the steps and compatibility notes.
Card Sizes
Right-click a card and open Size to choose:
- Single - normal one-slot card.
- Tall - spans two rows.
- Extra Tall - spans three rows.
- Wide - spans two columns.
- Extra Wide - spans three columns.
- Ultra Wide - spans five columns and is available on screens with a five-column grid.
- Large - spans a 2 x 2 area.
- Extra Large - spans a 3 x 3 area and is available for Media cover-art cards.
- Max Wide - spans a 3 x 2 area and is available for Camera cards.
- Max tall - spans a 2 x 3 area and is available for Camera cards.
- Massive Wide (3x4) - spans three rows by four columns and is available for Camera cards when the current screen orientation has room.
- Massive (4x3) - spans four rows by three columns and is available for Camera and Media cover-art cards when the current screen orientation has room.
If a card already occupies the space needed for a larger size, the setup page tries to move it to the next available slot. If there is not enough room, the size change is not applied.
Device Settings
The Settings tab groups the current controls as follows. Open a card to see its options; some options appear only when their feature is enabled.
| Section | Settings |
|---|---|
| Display | Appearance, Backlight, Idle, Clock Bar, Rotation |
| Sleep & Schedule | Cover Art Screen Saver, Screensaver, Night Schedule |
| Preferences | Language, Time, Temperature |
| System | Device Name, Backup, Firmware, Home Assistant Settings, Battery, Factory Reset |
Device-specific settings, including Rotation and Battery, appear only on supported panels. Device Name and Factory Reset also require firmware that supports them.
Home Assistant Settings
Open Settings > System > Home Assistant Settings to manage camera/image and media artwork connections. Automatic can use the local URL advertised by the connected Home Assistant instance when the URL uses the same IP address as the native ESPHome connection; it keeps the advertised protocol and port together. Home Assistant's separate Internet URL is not used.
The panel checks candidates in the background. If the advertised local URL cannot be reached, it checks the connected server's advertised HTTP port with the configured protocol, then the other protocol for a local/private address. Its final fallback uses the configured protocol and port with the connected server's IP. If multicast discovery is blocked or ambiguous, only that configured fallback is used; EspControl does not scan ports or guess hostnames.
The settings show the endpoint, its source (Automatic, Fallback, or Manual) and connection health. Connection checked means the public Home Assistant manifest responded; Images received means an image download succeeded. Access errors, camera errors and invalid images do not cause EspControl to switch servers. Repeated connection failures trigger a background recheck. Complete artwork URLs supplied by media services or external CDNs are preserved.
Choose Manual to set Home Assistant Host (optional), Home Assistant Protocol (http or https), and Home Assistant Port (1–65535). Leave Host blank to use the address of the connected Home Assistant API client. A hostname lets HTTPS use a certificate issued to that DNS name; the panel still verifies certificates, so a self-signed certificate must be trusted separately. Automatic discovery only accepts an advertised URL whose host is the same IP address as the connected Home Assistant API client. Use Manual for a hostname-based proxy or a proxy on a different host.
The native ESPHome connection and image downloads are separate connections. If controls work but images fail, compare the displayed endpoint with Home Assistant > Settings > System > Network > Home Assistant URL > Local network. Access denied can indicate an authentication or IP-ban policy; changing HTTP/HTTPS will not repair that policy. A restricted manifest endpoint may show Connection failed until a real image download succeeds.
Apply Configuration
After making changes, tap Apply Configuration at the bottom of the page. The panel restarts and loads your new settings — you'll see a message while it reconnects.
Restart From Home Assistant
Each EspControl device has an enabled Restart button in Home Assistant. Open Settings > Devices & services > ESPHome, choose your EspControl device, and look under its configuration controls. Pressing Restart safely restarts the display without changing its cards, brightness, schedules, or other saved settings.
You can also press the button from a Home Assistant automation. Replace button.your_panel_restart with the Restart entity shown for your display:
actions:
  - action: button.press
    target:
      entity_id: button.your_panel_restart
If the automation runs when Home Assistant starts, wait until the Restart entity is available before pressing it:
actions:
  - wait_template: >
      {{ states.button.your_panel_restart is not none
         and not is_state('button.your_panel_restart', 'unavailable') }}
  - action: button.press
    target:
      entity_id: button.your_panel_restart
The web setup page's Apply Configuration button remains separate: use it after saving web settings, and use the Home Assistant Restart entity when you only need to restart the display.
Naming Your Panel
On firmware that supports panel naming, open Settings > System > Device Name. Enter a name such as Kitchen, check the address preview, then choose Save & Restart. The name appears in the web interface, browser tab, the panel's network information and Home Assistant. The address becomes something like kitchen-b2c3.local; the four-character suffix comes from the panel's MAC address.
The page shows the new address and current IP before restarting. Reopen the panel using either link. Router-managed DNS entries may need updating separately. Clearing the name restores the firmware's original name and address. Normal OTA updates retain your custom name; older firmware without naming support uses its compiled defaults.
Home Assistant should update the existing device after reconnecting. A name you assigned manually in Home Assistant takes precedence. Existing entity IDs remain unchanged, but custom ESPHome action names include the hostname: update automations using actions such as esphome.<old_name>_navigate. Reload the ESPHome integration if its action list still shows the previous names.