Sensor
A sensor card displays live sensor data. By default it uses Home Assistant entities, and it can also use local sensors running directly on the display device.
It has three Home Assistant modes:
- Icon — shows an icon and can change to an on icon when the sensor is active.
- Numeric — shows a large number with an optional unit and label. This is the default mode.
- Text — shows a chosen icon and displays the live text state where a normal card label would appear.
Sensor cards are read-only — tapping them does nothing.
Setting Up a Sensor Card
- Select a card and change its type to Sensor.
- Leave Source set to Home Assistant. This is the default.
- Choose Icon, Numeric, or Text from the mode tabs. Numeric is selected by default.
- Enter a Sensor Entity — the Home Assistant entity ID of the sensor you want to display.
To display a sensor that runs directly on the device, change Source to Local Sensor. See Local Sensor for the local setup details.
For Icon mode:
- Choose an Icon for the normal state.
- Choose an On Icon if you want a different icon when the sensor is active.
- Set a Label if you want custom text. If left blank, the entity name from Home Assistant is used.
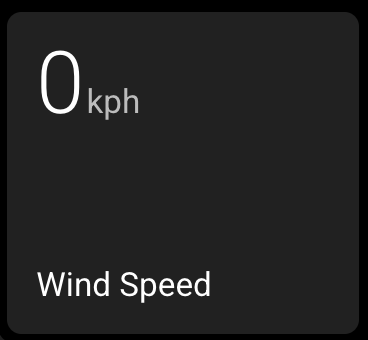
For Numeric mode:
- Set a Unit — the unit label shown next to the value, for example
°C,%,W, orkWh. - Set a Label if you want custom text under the value. If left blank, the entity name from Home Assistant is used.
- Set Unit Precision if you want one or two decimal places.
- On a Large card, turn on Large Sensor Numbers if you want the top sensor readout scaled much larger.
For Text mode:
- Choose an Icon. This icon is always shown and does not change based on the sensor value.
- The live state from Home Assistant is shown where a Switch card label would normally appear.
- Open Advanced if you want to replace raw Home Assistant states with friendlier labels. For example, you can show
Please emptywhen the sensor reportshigh, andFullwhen another sensor state reportslow.
How It Works on the Panel
- Icon mode treats active Home Assistant states such as
on,true,home,playing,open, orunlockedas active and uses the on icon when configured. - Numeric mode displays the current value in large text, with the unit beside it and the label underneath.
- Numeric mode uses the fixed tertiary background colour, so it remains visually distinct from Switch and Trigger cards.
- Text mode uses the same tertiary colour as Numeric mode, while keeping the normal Switch-style icon and label layout.
- Text mode capitalises each word in the Home Assistant text and preserves line breaks. Advanced status translation is applied before the text is shown. Very long values are limited to roughly 256 characters so the panel stays responsive.
Example Sensors
| Entity | Mode | Unit | What it shows |
|---|---|---|---|
sensor.living_room_temperature | Numeric | °C | Indoor temperature |
sensor.solar_power | Numeric | W | Current solar generation |
sensor.humidity | Numeric | % | Relative humidity |
binary_sensor.laundry_running | Icon | Laundry running or idle | |
text_sensor.washing_machine_status | Text | Running, Rinsing, or Finished | |
sensor.fan_level | Text | low, medium, or high |