Slider
A slider card lets you control the brightness of a Home Assistant light entity or the speed of a Home Assistant fan entity by dragging a vertical fill bar up or down.
For light-only controls, you may prefer the newer Lights card. It groups light switching, brightness, and colour temperature in one card type. Use Slider when you want a generic light or fan slider.
Setting Up a Slider
- Select a card and change its type to Slider.
- Enter an Entity — the Home Assistant light or fan entity you want to control (for example,
light.living_roomorfan.office_fan). - Set a Label (optional) — shown at the bottom of the card. If left blank, the entity's friendly name from Home Assistant is used.
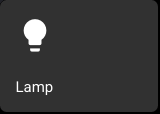
- Choose an Off Icon and On Icon. Existing sliders that only had one icon keep using that same icon for both states unless you change it.
How It Works on the Panel
- Drag the slider to set the brightness or fan speed from 0 to 100 percent. Releasing the slider sends the new value to Home Assistant.
- For lights, the slider uses Home Assistant's brightness control.
- For fans, the slider uses Home Assistant's percentage speed control.
- A coloured fill bar shows the current level in real time as it rises from the bottom of the card.
- When the light or fan changes externally (from Home Assistant or another control), the fill bar updates automatically to reflect the current level.
On and Off Icons
Slider cards always have separate Off Icon and On Icon fields. Use the same icon in both fields if you do not want the icon to change while the light or fan is on.